Overview
Use the QuickBooks setup window to:
QuickBooks Setup will let you choose which QuickBooks transaction types you would like to use for shipments and what information should be recorded automatically in QuickBooks once the shipment has been completed.
NOTE: To access this window, first open the OzLINK Settings screen. In the General menu, select QuickBooks.
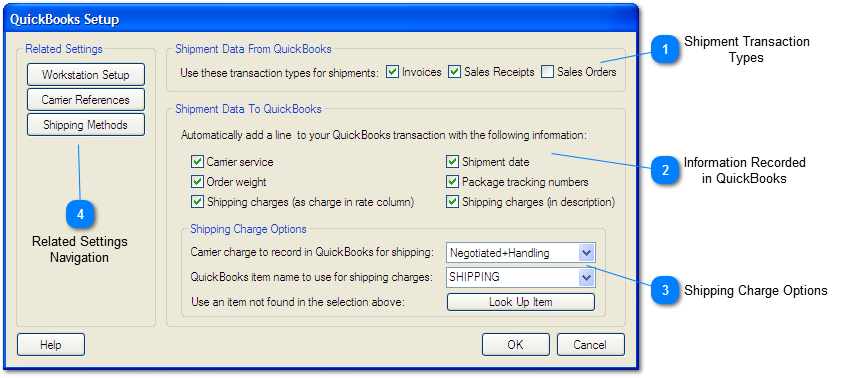
 Shipment Transaction Types
Check the transaction types that your company uses when fulfilling a shipment.
Leaving one or more of these transaction types unchecked can speed up your workflow and reduce mistakes in the event that a transaction number is reused. For instance, in QuickBooks it is possible to have an invoice number 1120 and a Sales Receipt number 1120 that belong to two completely different customers. When you use that transaction number in OzLINK, you will be asked to select either the invoice or sales receipt so that the correct information is transferred. If, however, your company only ships with invoices (only 'Invoices' checked off in this section), then OzLINK would use the invoice automatically and ignore the sales receipt. This removes the interrupting dialog box and helps reduce errors.
Suggestion: If overlapping transaction numbers are slowing you down, change your naming conventions to avoid duplicate entries. For example, name your invoices "IN-###" and your sales receipts "SR-###."
|
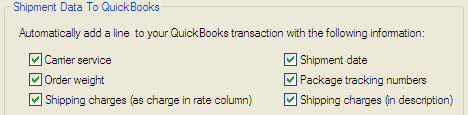
 Information Recorded in QuickBooks
This section allows you to choose the information that will be added to your QuickBooks transaction once shipping is complete. OzLINK will create a single line item in the transaction to hold all of the checked information. For most of the checkboxes, the information will be written in the description column of the line. In the case of "Shipping charges (as charge in rate column)", the shipping charge will be written in the 'rate' column of the transaction, and will impact the final price on the transaction. To set up the name of the item and the details on shipping charges, see the section below on 'Shipping Charge Options.'
Example line from a QuickBooks invoice, with all options checked and item name "SHIPPING":
|
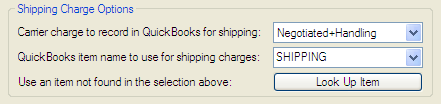
 Shipping Charge Options
This section allows you to control the way the shipping charge is recorded in QuickBooks.
Carrier Charge
The first dropdown, "Carrier charge used to record in QuickBooks for shipping," determines the actual number that is used for shipping charges. Options include:
This will put the normal list price in the QuickBooks transaction. This is usually used if you do not have negotiated rates with your carrier or if you'd like to charge the full shipping price to your customer. If you are using FedEx Ship Manager you must first download your list rates from inside your carrier software.
This will use the normal list price, as above, and add any handling charges that you have defined in your carrier software. The rate will show up as a single cost for shipping in your transaction and will not mention handling. (NOTE: this section refers ONLY to handling charges set up in the carrier, not those set up in the OzLINK handling section. Generally it is best to configure handling in your carrier or in OzLINK, but not in both.) If you are using FedEx Ship Manager you must first download your list rates from inside your carrier software.
This will put the negotiated shipping price in the QuickBooks transaction. Negotiated shipping prices are reduced prices that some companies receive from their carriers. This option is usually used to pass on savings to your customer. If you are using UPS WorldShip you must first download your negotiated rates from inside your carrier software.
This will use the negotiated price, as above, and add any handling charges that you have defined in your carrier software. The rate will show up as a single cost for shipping in your transaction and will not mention handling. (NOTE: this section refers ONLY to handling charges set up in the carrier, not those set up in the OzLINK handling section. Generally it is best to configure handling in your carrier or in OzLINK, but not in both.) If you are using UPS WorldShip you must first download your negotiated rates from inside your carrier software.
QuickBooks Item Name
This is the name that will be used when creating a new line in your QuickBooks document.
The dropdown contains a list of all of the 'service' items that you have defined in QuickBooks. If the item you use for shipping charges is not listed, you can:
OR
Clicking 'Lookup Item' will allow you to type in any item name that already exists in QuickBooks. OzLINK will connect with QuickBooks to confirm that the item name is valid. (Note that if an item name is chosen that does not exist in QuickBooks, there will be a warning message. OzLINK will not create a new shipping item in QuickBooks.)
|
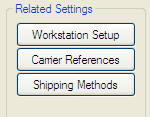
 Related Settings Navigation
The related settings area allows you to quickly move between various setup pages in OzLINK.
|
|